Appearance
Rack Elevation
The front view of every rack, unit by unit, grouped into rows. It is where you decide what goes in which rack and at what height. The app opens on this view.
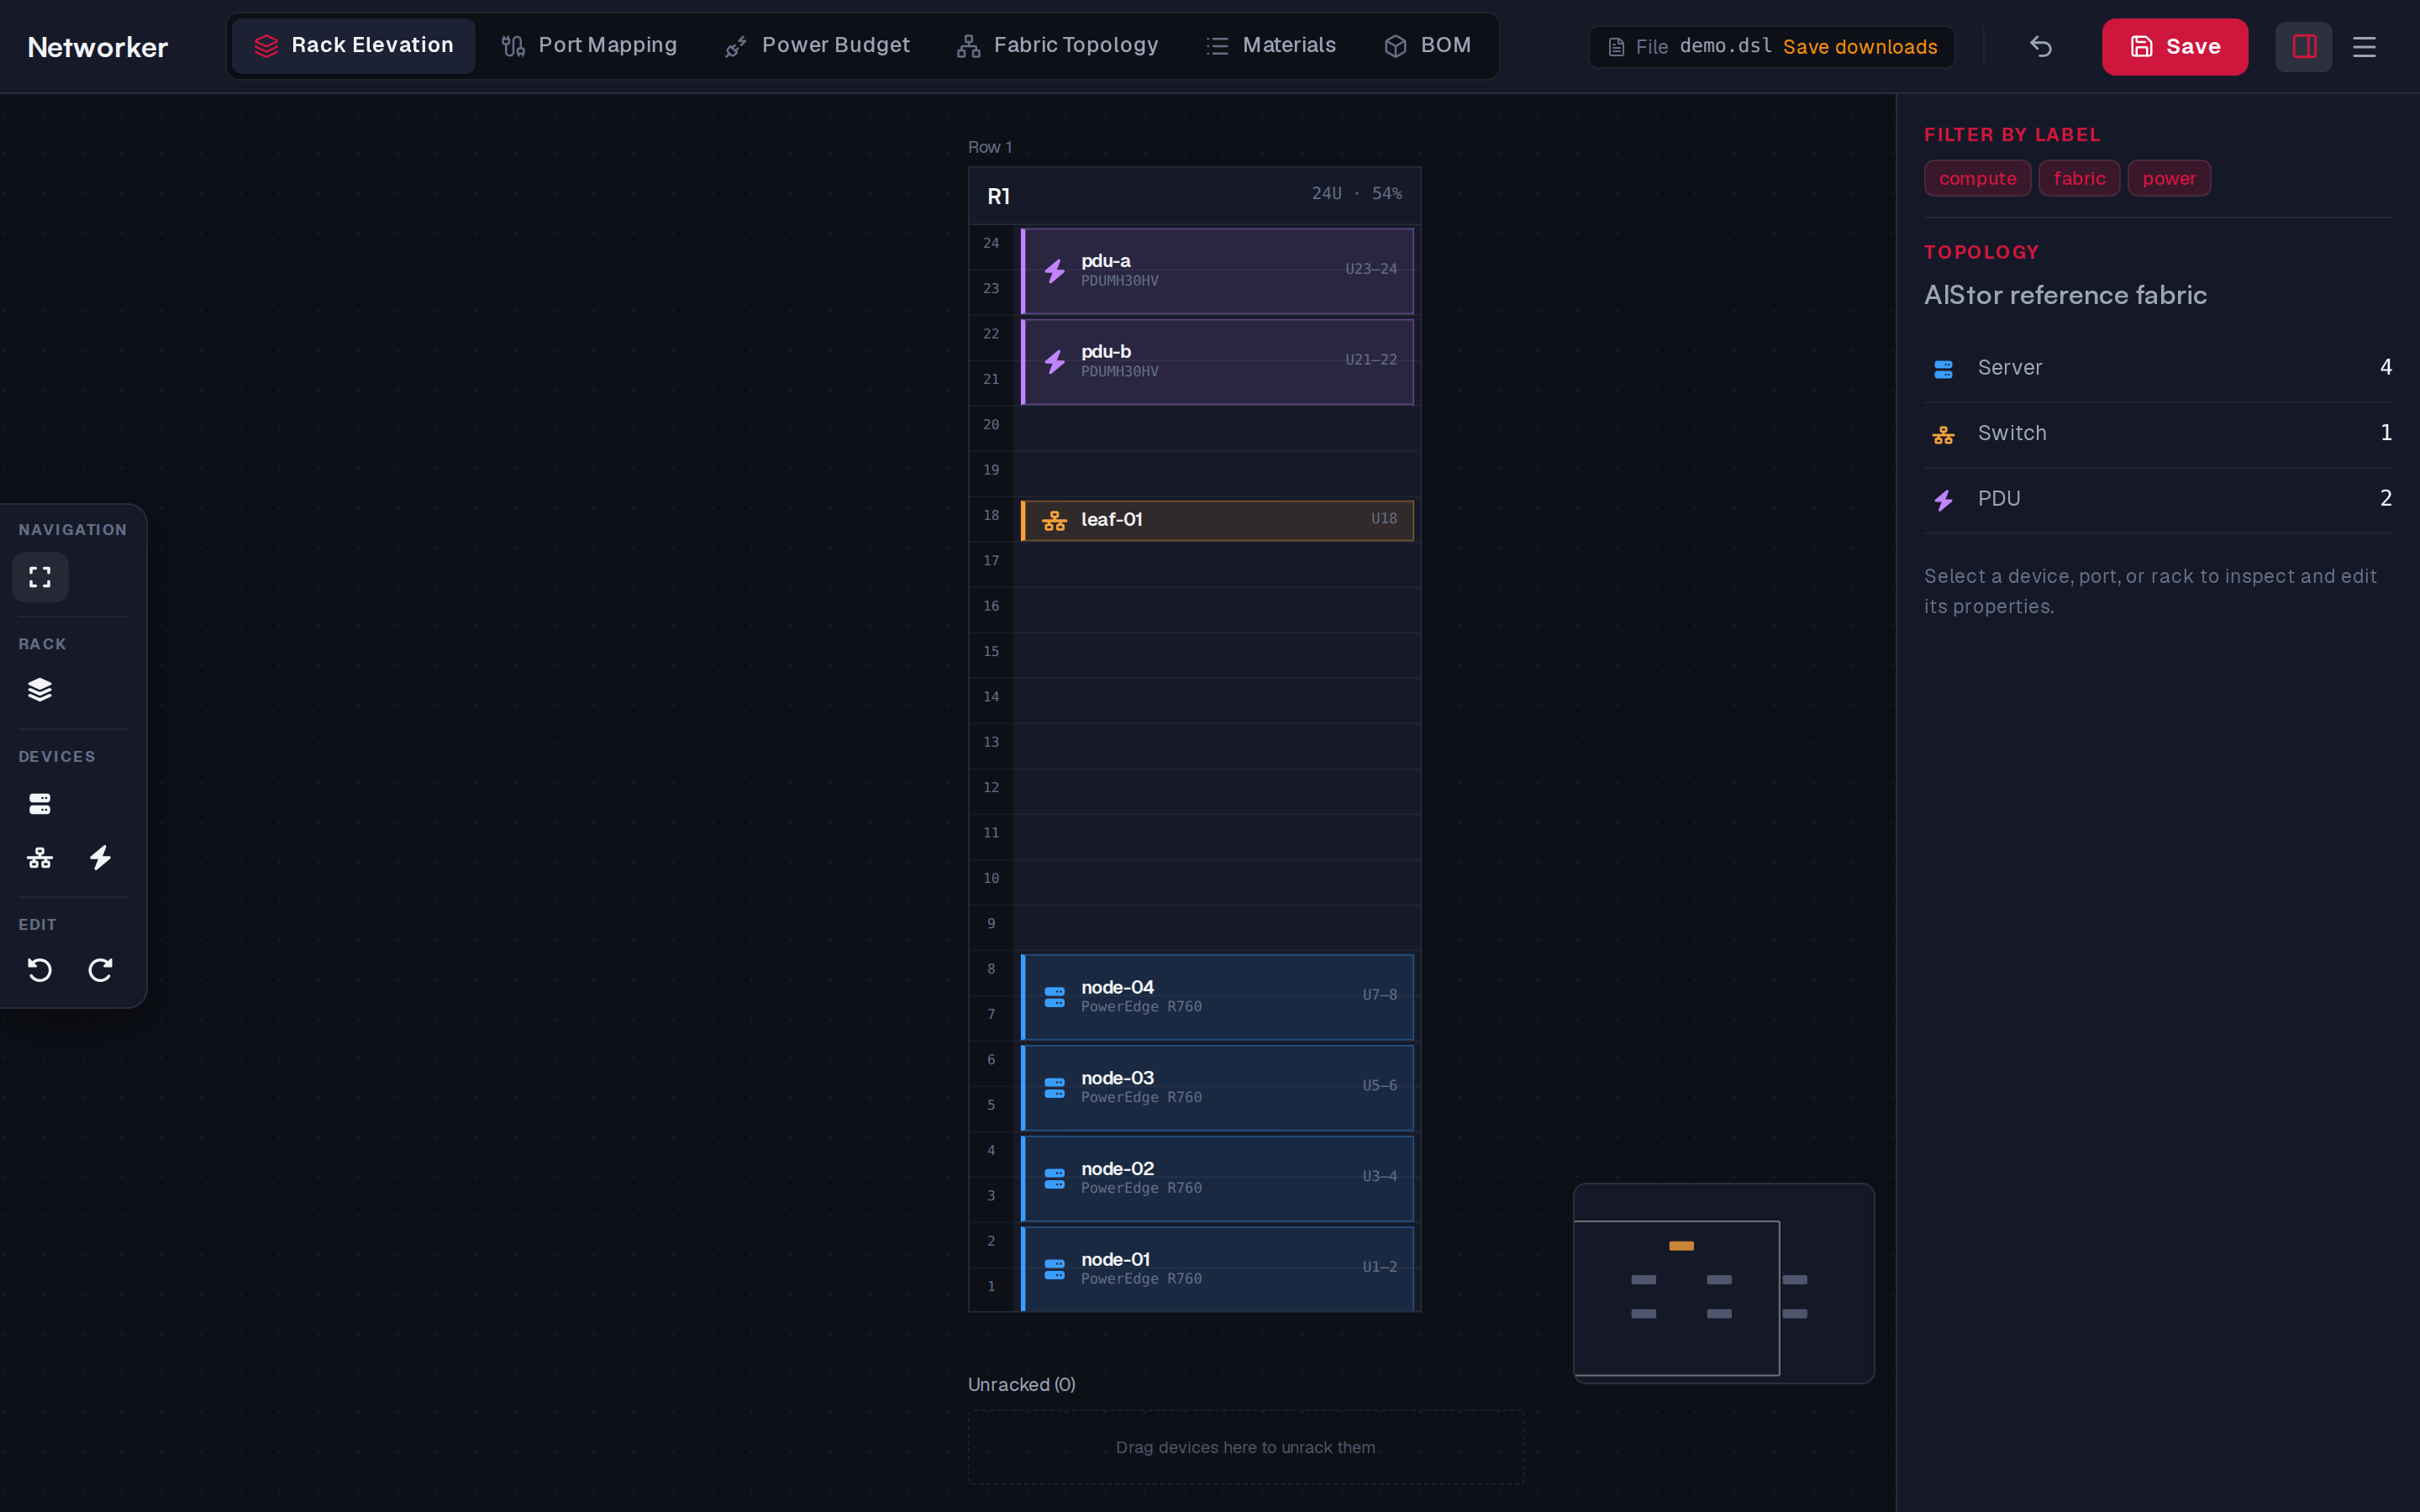
What you can do here
| Task | How |
|---|---|
| Add a rack | Add Rack or 0. With a rack selected, the new one is a copy of it, devices included |
| Change a rack's height, label or row | Select it and edit Units, Label, Row in the side panel |
| Place a server, switch or PDU | 1, 3 or 4, pick a template, click a free slot |
| Move devices | Drag them to another slot or rack; every selected device moves |
| Unrack a device | Drag it to Unracked below the racks |
| Rack an unracked device | Drag its card from Unracked into a rack |
| Delete a rack | Select it, then Delete. Its devices are unracked, not deleted |
| Select many devices | Shift+click, or Shift+drag a box |
| Fit everything | Fit All, or Ctrl+L |
Racks are drawn under Row N headings, in the order of their row. Devices hidden by the label filter are greyed out and hatched.
There is no cable drawing here: cables are drawn in Port Mapping and power cords in Power Budget.
Placement preview
With a device tool active, moving over a rack shows where the device would go: green with its size (N × NU) where it fits, red No space where it doesn't. When dragging existing devices, the preview reads N devices – NU in blue, or Occupied / Not enough space in red.
In the DSL
A rack is a <Rack>; a device's place in it is rackId and rackElevation (the lowest unit, counting from 1 at the bottom) plus rackUnits.
xml
<Rack label="CR01" units="48" row="1" />
<Server label="node-001" template="r760" rackId="CR01" rackElevation="1" />